Fork this workshop template
In this workshop we’re going to duplicate this same workshop to your own GitHub account, then make some edits together. Can tinker and reuse this template anytime on your own account.
1 Go to this workshop’s GitHub repository
2 Click on the option to Fork the repository
You’ll see an option to Fork at the top right of your screen.

GitHub should pause for a moment while it copies the files from this repo to yours. When it’s finished, you’ll see a note that the repo has been “forked from ubc-lib-geo/gis-workshop-waml-template” in the top left.
You should also see your new repository which contains the following files and directories:
.
├── Rakefile
├── _config.yml
├── _includes
├── _layouts
├── _sass
├── _site
├── assets
├── bin
├── content
├── index.md
├── README.md
└── lib
In this workshop we’re only going to be looking at a couple of these including the _config.yml file, the README.txt file, and the files inside the content folder.
3 Edit your _config.yml
We will need to publish this repository as a “GitHub Page”, so that it’s live at [your GitHub username].github.io. Right now it’s configured to appear at ubc-lib-geo.github.io. Before we publish, we’ll need to make some edits to our main site configuration file, ‘_config.yml’.
Step 1
Click on the _config.yml file in your list of files
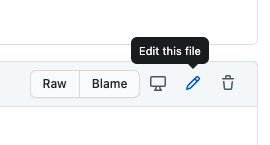
Step 2
Select the edit file tool on the top left
Step 3
Scroll down to line 28 and add your base hostname
You will want to make sure https://ubc-lib-geo.github.io is changed to https://[YOUR GITHUB USERNAME].github.io
Step 4
Next, go to line 40 and update the footer.
In line 40, you’ll want to replace ubc-lib-geo with your own username. The result should look like this:
footer_content: <a href="https://github.com/your_username/gis-workshop-waml-template" target="_blank">View this workshop in GitHub</a>
Step 5
Add a commit message and save
Add something brief to your commit message – you can literally recycle the provided “Updated _config.yml” language – then press Commit changes.
4 Go to your repository’s Settings menu
We’re almost ready to publish our workshop site! We can do that in our site’s Settings which is found by clicking the top right tab. 
5 Publish your workshop site
Scroll down to the settings for GitHub Pages (almost to the bottom (Danger Zone!)). Under Source select your only branch (either main or master).
Your site will take a moment (up to a couple of minutes) to build and propagate, but should soon be available at https://[YOUR GITHUB USERNAME].github.io/gis-workshop-waml-template/